SALE PRODUCTS


SPECIAL OFFER


Monin – Gourmet Flavorings Premium Coffee Collection


All-Absorb A26 Male Dog Wrap, 50 Count, Small

Schwarzkopf Gliss Hair Repair – Fiber Therapy


Natria 706250A Neem Oil Spray for Plants Pest Organic Disease Control


Aquaphor Baby Healing Ointment Advanced Therapy Skin Protectant


TRENDING


Honey Nut Cheerios, Whole Grain Cereal, Guardians of the Galaxy


Lenny & Larry’s The Complete Cookie, White Chocolaty Macadamia


The Sausage Maker – North American Natural Hog Casings


Kraft Original Macaroni & Cheese Dinner
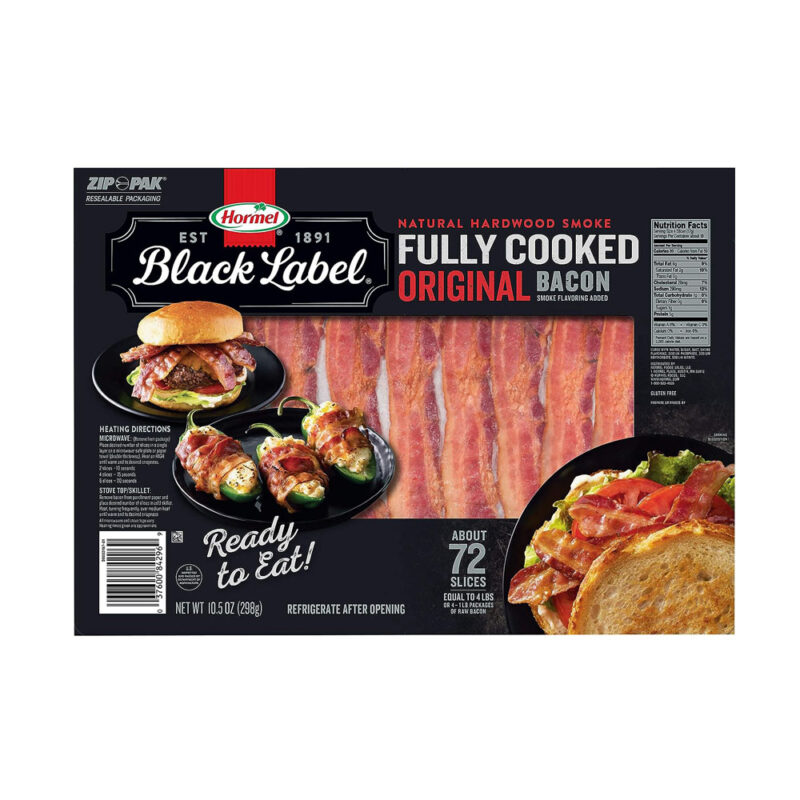

Hormel Black Label Fully Cooked Bacon (72 Slices)


Califia Farms – Oat Barista Blend Oat Milk, 32 Oz (Pack of 6)


NYX PROFESSIONAL MAKEUP Fat Oil Lip Drip
Original price was: $15.00.$9.00Current price is: $9.00.

CeraVe Eye Repair Cream | Under Eye Cream
Original price was: $25.00.$19.99Current price is: $19.99.


FEATURED


SPECIAL OFFER


COSORI Air Fryer Pro LE 5-Qt Airfryer, Quick and Easy Meals


OXO Good Grips Corn Prep Peeler


Lysol Pro Kitchen Spray Cleaner and Degreaser


Scotch-Brite Non-Scratch Scrub Sponges

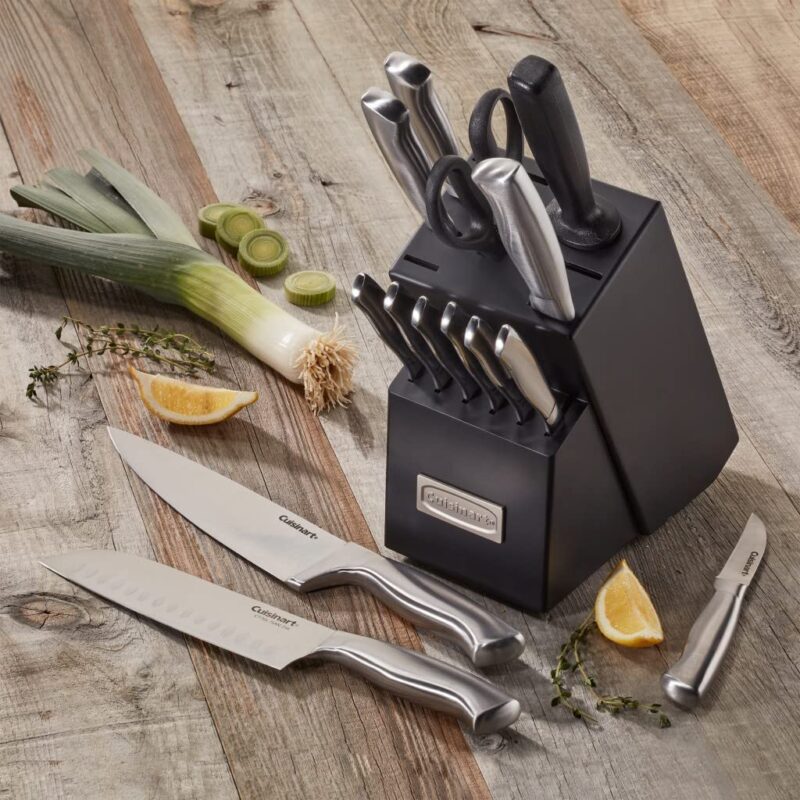
Cuisinart 15 Piece Kitchen Knife Set with Block


Cuisinart C55-12PCKSAM 12-Piece Ceramic Coated Stainless Steel Knives

KitchenAid RRK150IC 5 Qt. Artisan Series

