SALE PRODUCTS


SPECIAL OFFER


LEVOIT Air Purifiers for Home Large Room Bedroom Up to 1110 Ft²


Monin – Gourmet Flavorings Premium Coffee Collection


All-Absorb A26 Male Dog Wrap, 50 Count, Small


Descaler (2 Pack, 2 Uses Per Bottle) – Made in the USA


Natria 706250A Neem Oil Spray for Plants Pest Organic Disease Control


TRENDING


ChocZero Keto Milk Chocolate Hazelnut Spread

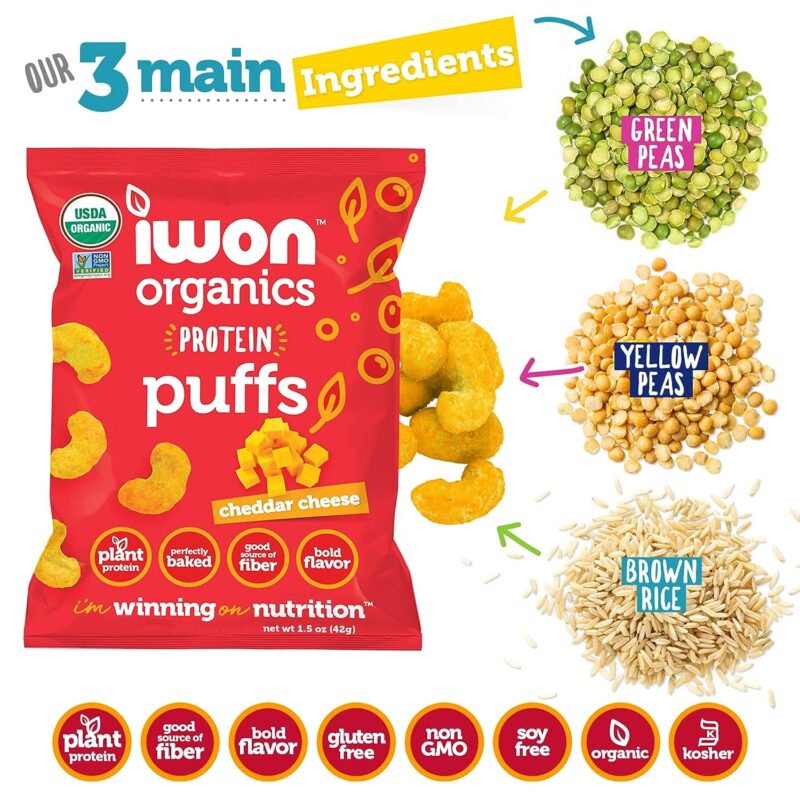
Iwon Organics Protein Puffs Cheddar Cheese Flavor, Vegan


Spice Supreme M.S.G. Monosodium Glutamate, plastic shaker
Monin – Gourmet Flavorings Premium Coffee Collection


Honey Nut Cheerios, Whole Grain Cereal, Guardians of the Galaxy


Quest Nutrition Tortilla Style Protein Chips Variety Pack


CeraVe Eye Repair Cream | Under Eye Cream
Original price was: $25.00.$19.99Current price is: $19.99.


FEATURED


SPECIAL OFFER


TOSHIBA EM131A5C-BS Countertop Microwave Ovens


Ninja AF101 Air Fryer that Crisps, Roasts, Reheats, & Dehydrates, for Quick, Easy Meals


Glad ForceFlex Protection Series Tall Kitchen Trash Bags


Mueller UltraToast Full Stainless Steel Toaster 4 Slice with Removable Tray


Hefty Ultra Strong Tall Kitchen Trash Bags

KitchenAid RRK150IC 5 Qt. Artisan Series


Cuisinart C55-12PCKSAM 12-Piece Ceramic Coated Stainless Steel Knives

